I’ve created this fully functional To-Do-List code in JavaScript and explained how each line of code works within the comments in this document.
JavaScript Logic
Here’s a simple and beginner friendly way to write the logic. First, the HTML file is given below :
<!DOCTYPE html>
<html lang="en">
  <head>
    <meta charset="UTF-8" />
    <meta http-equiv="X-UA-Compatible" content="IE=edge" />
    <meta name="viewport" content="width=device-width, initial-scale=1.0" />
    <title>To Do List</title>
    <link rel="stylesheet" href="style.css" />
  </head>
  <body>
    <div class="main">
      <h1>To Do List</h1>
      <input id="input" type="text" /><button id="clickPlus">+</button>
      <div class="to-do" id="container"></div>
    </div>
    <script src="app.js"></script>
  </body>
</html>
The HTML file above is pretty simple. Note that there’s a blank div container with an ID of container. Here, the typed list items will be generated dynamically using JavaScript.
Next down below, we have the CSS file. Here, we’re just using display : flex to align things.
.main {
  display: flex;
  flex-direction: column;
  align-items: center;
}

#input {
  width: 200px;
  height: 30px;
  border: 2px solid black;
  font-size: 25px;
}

#clickPlus {
  width: 50px;
  height: 50px;
  margin-top: 10px;
  font-size: 35px;
}

.inputTextStyle {
  cursor: pointer;
}

#container {
  font-size: 25px;
}
Notice that we’ve given a class called inputTextStyle above which will also be used dynamically in the JavaScript code.
Finally, here’s the main JavaScript logic for the To Do List :
let input = document.getElementById("input");
let clickPlus = document.getElementById("clickPlus");
let container = document.getElementById("container");

clickPlus.addEventListener("click", function () {
  var inputText = document.createElement("p");
  inputText.classList.add("inputTextStyle");
  inputText.innerText = input.value;
  container.appendChild(inputText);
  input.value = "";

  inputText.addEventListener("click", function () {
    inputText.style.textDecoration = "line-through";
  });

  inputText.addEventListener("dblclick", function () {
    container.removeChild(inputText);
  });
});
Here’s how it looks like :
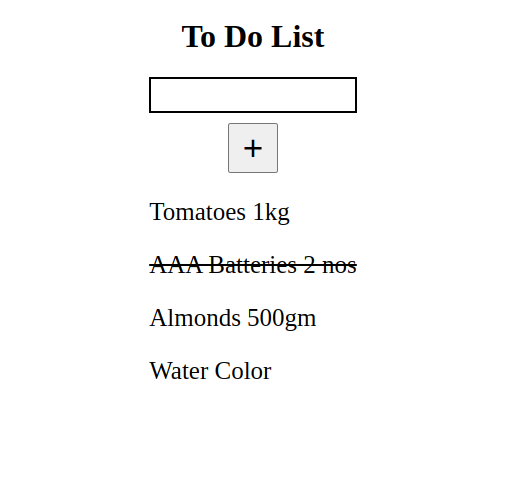
Functionality
Here’s how it functions – When you type in the item inside the box and click on the ‘+’ button the item gets added downwards, one by one. If you click on an item once, it get a ‘strike-through’ line, and, if you double-click any item from the list of items, it gets deleted.
Explanation of the JS Code
Here’s the code with the explanation of what’s happening inside the logic with the comments below :
let input = document.getElementById("input");
let clickPlus = document.getElementById("clickPlus");
let container = document.getElementById("container");
// DOM items defined with variables

clickPlus.addEventListener("click", function () {
  var inputText = document.createElement("p");
// created paragraph 'p' tag to receive input text
  inputText.classList.add("inputTextStyle");
// inputTextStyle added dynamically from CSS file
  inputText.innerText = input.value;
// to create value inside 'p' tag
  container.appendChild(inputText);
// adds input downward dynamically from HTML file
  input.value = "";
// makes input field empty after you click '+'

  inputText.addEventListener("click", function () {
    inputText.style.textDecoration = "line-through";
  });
// strike through on single click

  inputText.addEventListener("dblclick", function () {
    container.removeChild(inputText);
  });
// removes item on double-click
});